What Are The 7 Basic Commands for Dog Training You Should Know

what are the 7 basic commands for dog training

What are The 7 Basic Commands for Dog Training Every Pet Parent Should Know

Training your dog is one of the most rewarding parts of being a pet parent. It helps your furry friend become well-behaved and strengthens the bond you share. If you’ve ever wondered, what are the 7 basic commands for dog training, this guide is for you. These essential commands are the foundation of good behavior and effective communication. They make daily life safer and more enjoyable for you and your dog.

Whether you’re teaching your puppy for the first time or refreshing their skills at home or with the help of a professional trainer, mastering these basics is the first step toward a happy, confident pet.

In this post, we’ll break down each command and explain why they’re so important. Let’s get started on building a strong connection with your dog through simple, effective training!

Importance of Basic Obedience

Think of basic obedience training as the foundation of a fantastic relationship with your dog. It’s not about control; it’s about clear communication and mutual understanding. When your dog understands and responds to your cues, it creates a safer environment for everyone.

Imagine this: You’re at the park, and your dog spots a squirrel. Suddenly, they’re off! With a reliable “Come” command, you can easily recall them, preventing a dangerous dash into traffic.

But the benefits go beyond safety:

  1. Training strengthens your bond with your dog. Every successful interaction builds trust and reinforces your role as their leader.
  2. Basic commands like “Sit” and “Stay” help prevent unwanted behaviors like jumping, barking, and counter surfing.
  3. A well-trained dog is a happier dog! They feel more confident and secure, knowing what’s expected of them. This translates into a more relaxed and enjoyable life for both of you.

In essence, basic obedience is an investment in your relationship with your dog. It’s about building a strong foundation for a lifetime of love, laughter, and adventures.

what are the 7 basic commands for dog training

The 7 Basic Commands in Dog Training

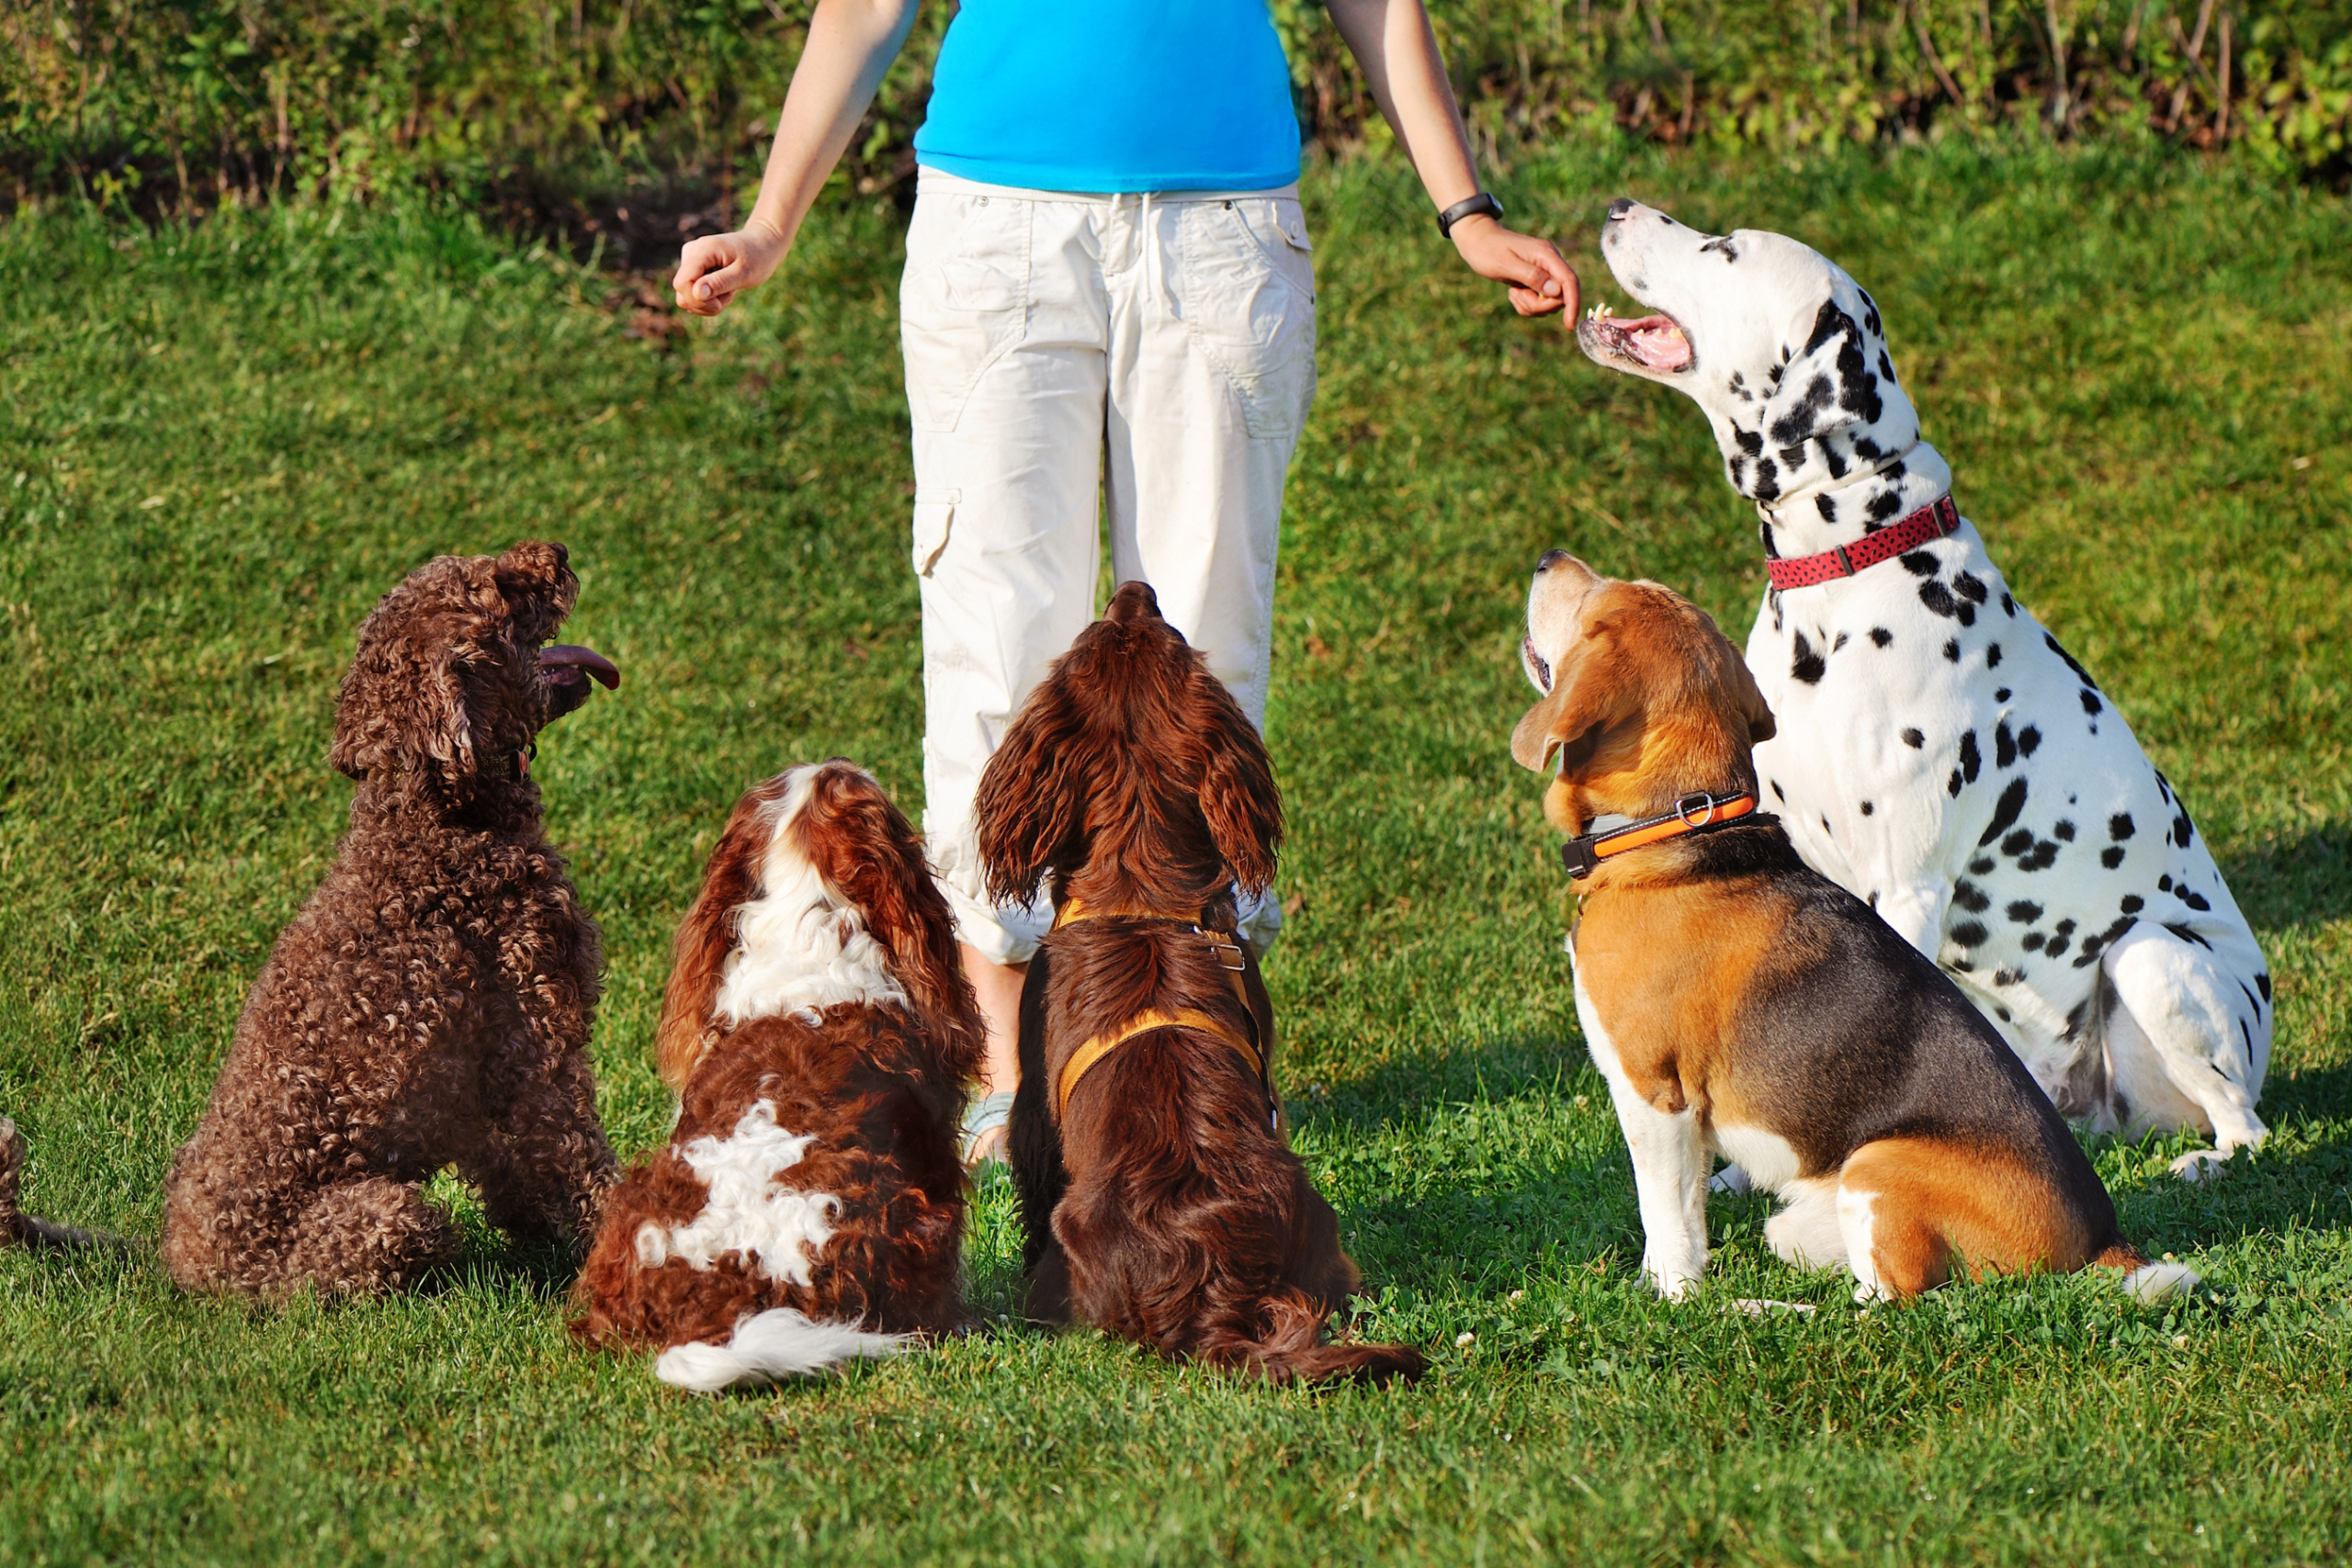
These seven commands are like the ABCs of dog training — simple, effective, and essential for every pet parent to know.

From helping your dog stay calm in busy areas to keeping them safe during unexpected situations, these commands set the foundation for a happy and well-behaved companion. Let’s get started with these fundamental commands.

Sit: The Foundation of Good Behavior

The “Sit” command is the cornerstone of dog training. It’s a simple yet powerful instruction that teaches your dog to be patient and attentive.

“Sit” is the building block for other commands like “Stay” and “Down”. Teaching your dog to “Sit” helps them learn to control their impulses and wait for your cue before engaging in an activity.

A Variety of Training Methods

You can teach “Sit” using various methods, such as luring them into position with a treat or rewarding them when they naturally sit on their own (capturing the behavior).

Stay: Building Patience and Control

The “Stay” command is all about teaching your dog patience and self-control. It’s crucial for their safety and helps them learn to wait for your permission before moving.

Here are some key tips for teaching the “Stay” command:

  • Start small, build big – Begin with short “Stays” (a few seconds) and gradually increase the duration as your dog improves.
  • Release word is key – Use a consistent release word like “Free” or “Okay” to signal that your dog can move again. This helps them understand that “Stay” is not forever.

Come: Ensuring Reliable Recall

A reliable “Come” command is essential for your dog’s safety. You want them to return to you promptly when called, even in exciting or distracting situations. Use an enthusiastic tone and pair the “Come” command with high-value rewards (like favorite treats or toys). Start in a controlled environment and gradually introduce distractions like other dogs, people, and noises.

Down: Encouraging Calm and Relaxed Behavior

“Down” is a calming command that’s especially helpful in situations like grooming, vet visits, or when you need your dog to settle in a busy area. It teaches your dog to relax and submit, which can reduce anxiety and overexcitement.

Start with short durations and make sure your dog is comfortable. Use positive reinforcement and avoid forcing them into the “Down” position.

Leave It: Preventing Dangerous Behavior

“Leave it” is a lifesaving command that every dog should know. It can stop your dog from picking up something harmful, like a toxic plant, sharp object, or food they shouldn’t eat. Beyond safety, this command also teaches your dog impulse control and how to focus on you, even when something tempting catches their eye.

Here’s how to teach “Leave it”:

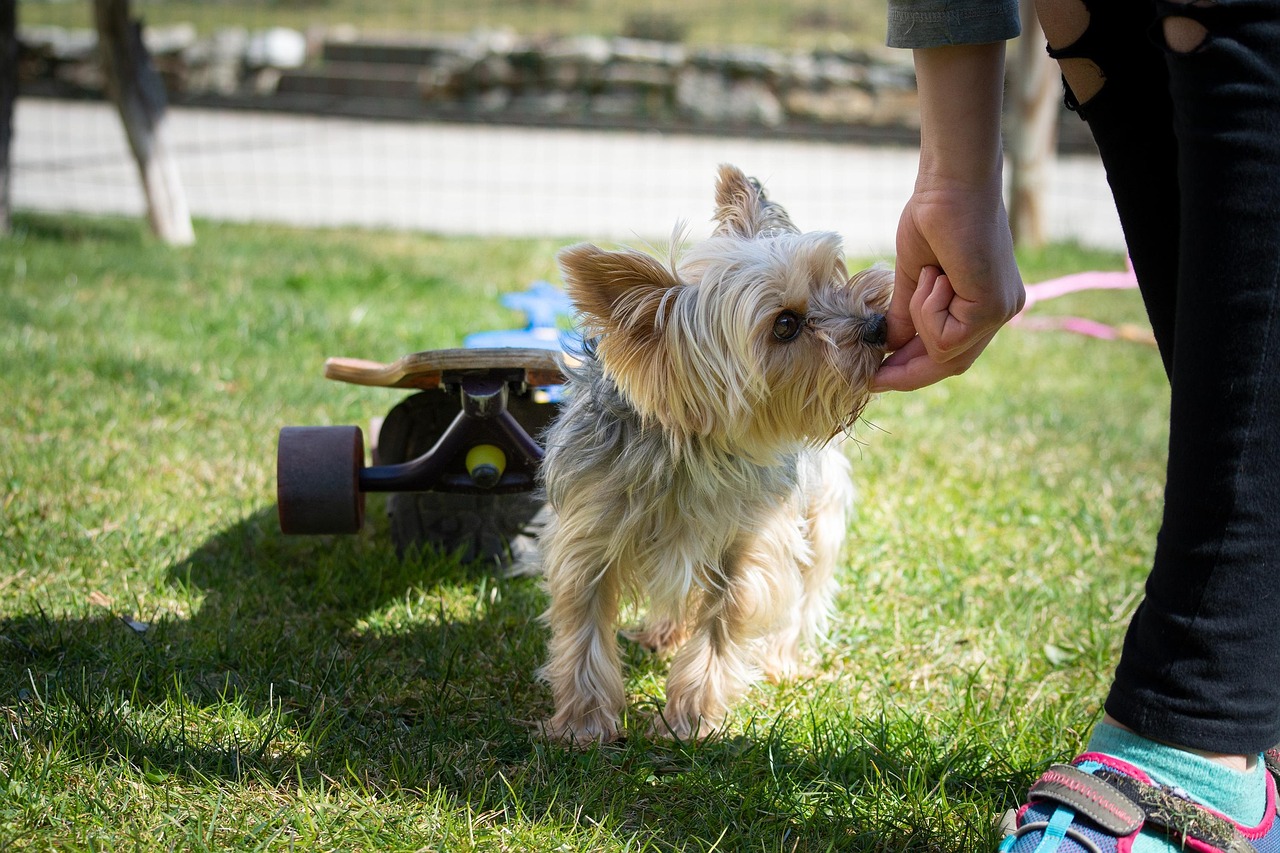
  1. Start with a treat in your hand and close your fist around it.
  2. When your dog stops trying to get it, reward them with a different treat.
  3. Gradually introduce distractions and practice in various settings.
  4. Always use high-value rewards when your dog successfully disengages. This helps reinforce the behavior and makes it clear that listening to you is always worth it.

Heel: Walking Calmly By Your Side

Walking your dog should be enjoyable, not a constant battle with pulling and distractions. The “Heel” command teaches your dog to walk calmly beside you, creating a more pleasant experience for both of you. It’s also a great way to practice proper social etiquette during walks.

Training Techniques: Use positive reinforcement methods like rewarding your dog for walking calmly beside you. Consider using a head halter or harness to help manage pulling.

Place: Teaching to Prevent Unwanted Behavior

The “Place” command is perfect for teaching your dog to go to a designated spot, like a bed or mat, and stay there until released. This command is incredibly useful for calming your dog during mealtime, when guests arrive, or in other situations where you need them to settle down.

Steps to teach “Place”:

  1. Guide your dog to the designated spot using a treat or leash.
  2. Reward them when all four paws are on the spot.
  3. Gradually increase the time they stay there before releasing them with a word like “Okay.”

The “Place” command not only prevents unwanted behaviors but also gives your dog a safe space to relax and feel secure. It’s a simple yet powerful tool for managing your dog’s behavior.

Common Mistakes to Avoid When Teaching Commands

Training your dog can be a rewarding experience, but certain mistakes can slow progress or confuse your furry friend. Being aware of these common pitfalls can help you train more effectively and strengthen your bond with your dog.

Here are a few to watch out for:

1. Inconsistent commands – Using different words for the same command (e.g., “Sit” sometimes and “Up” other times) confuses your dog.
Solution: Choose one word for each command and stick to it consistently.

2. Treat dependency – Relying too heavily on treats can make your dog less responsive to commands when treats aren’t available.
Solution: Gradually phase out treats by rewarding them with praise, petting, or playtime.

3. Lack of patience – Every dog learns at their own pace. Getting frustrated or impatient can create a stressful training environment.
Solution: Remember to be patient and understanding. Celebrate small victories and take breaks when needed.

Mastering the Basics for a Better Life with Your Dog

Mastering these 7 basic commands provides a strong foundation for more advanced training, such as agility, obedience competitions, or even therapy dog work.

Begin training early in your dog’s life and maintain consistency in your approach. Start training early, and remember that patience and consistency are your best tools. Every dog learns at their own pace, so celebrate progress, no matter how small, and keep the experience positive and fun.

Ready to start training? Begin practicing these commands with your dog today!

Check out our blog for training tips, resources, and valuable advice to make your training journey successful.

If you’re feeling overwhelmed or unsure where to begin and considering enrolling in a local dog training class or seeking guidance from a certified professional dog trainer, reach out to us! We will assist you every step of the way in your dog training journey.

Enjoy the rewarding journey of building a strong, loving bond with your dog. Together, you’ll create a lifetime of trust, happiness, and unforgettable moments.

What is Positive Punishment in Dog Training: Pros, Cons, and Tips

What is Positive Punishment in Dog Training

What is Positive Punishment in Dog Training: Pros, Cons, and Tips

Dog training is an essential part of raising a well-behaved pet, and there are many methods to guide a dog’s behavior. One approach, often discussed in training circles, is positive punishment.

But what is positive punishment in dog training? Simply put, positive punishment involves adding something unpleasant to discourage unwanted behavior. For example using a loud noise or a leash correction, after a behavior to decrease the likelihood of that behavior happening again.

This fits into the four quadrants of operant conditioning, where something is added (positive) to decrease a behavior (punishment).

While it can be effective in certain situations, it’s important to use it thoughtfully to avoid harming your dog’s trust or well-being.

This article explores the pros and cons of positive punishment and offers practical tips for using it responsibly. Whether you’re a new dog owner or refining your training techniques, this guide will help you make informed choices for your furry friend.

Understanding Positive Punishment in Dog Training

Imagine your dog jumps on the counter. To discourage this, you might loudly say “NO!” or use a short, sharp leash correction. This is positive punishment. In dog training, it means adding something unpleasant after a behavior to make the dog less likely to repeat it.

Examples of positive punishment:

  • Leash corrections – A sudden tug on the leash when your dog pulls.
  • Spray bottles – A quick squirt of water from a spray bottle when your dog barks excessively.
  • Loud noises – Yelling “NO!” or using a noise-making device like an air horn.
  • Physical corrections – Using physical force, such as pushing or hitting. (Important: Physical corrections are highly discouraged and can be dangerous.)

How Does Positive Punishment Differ from Other Training Methods

Positive punishment often gets confused with negative punishment, but they are different. Positive punishment adds something unpleasant to stop bad behavior, like a firm “no” when your dog chews furniture.

Negative punishment, on the other hand, removes something enjoyable to discourage bad behavior — for example, taking away a toy when your dog plays too roughly.

Unlike methods that focus on rewards, positive punishment can feel more corrective. While it has its place, it’s often best combined with positive reinforcement to create a balanced and humane training approach.

Importance of Ethical and Humane Training

Your dog is more than a pet — they’re family. That’s why it’s so important to choose training methods that are kind and effective.

While positive punishment can work, it should never involve fear or pain. Harsh punishments can harm your dog’s trust and create anxiety, which can lead to more behavior problems.

The best training methods prioritize your dog’s happiness and strengthen the bond you share. Always aim for a balanced approach that encourages learning in a safe, supportive way.

Common Misconceptions about Positive Punishment

Here are two of the most common misconceptions about

  1. Dominance Theory: This outdated idea suggests that dogs need to be dominated by their owners. This is simply not true. Dogs are social animals who thrive on clear leadership and positive guidance, not forced submission.
  2. Pack Leader: This concept is also misleading. Dog packs have complex social structures that are very different from human families.

Let’s be clear: dogs are not wolves, and humans are not their alphas. Effective training focuses on building a mutually respectful relationship based on trust and clear communication.

What is Positive Punishment in Dog Training

Pros of Positive Punishment (if applicable)

Important Note: This section acknowledges that, in limited situations, positive punishment might appear to have some short-term benefits.

However, it’s crucial to understand that these potential “pros” often come at a significant cost to the dog’s emotional well-being and the human-animal bond.

Potential for Quick Results

One potential “pro” of positive punishment is that it can sometimes lead to a quick suppression of a behavior. If applied consistently and immediately after the unwanted behavior, it can create a strong association between the behavior and the unpleasant consequence. For example, a loud “NO!” might immediately stop a dog from jumping on a guest.

Immediate Behavioral Correction

In situations where a behavior poses an immediate danger (such as a dog lunging at another dog or a child), a quick intervention might be necessary to prevent harm. Positive punishment, if used carefully and minimally, could be considered in these extreme circumstances.

Supporting Training Goals

In some cases, positive punishment might be used as a very limited tool to support other training methods. For example, if a dog is consistently ignoring commands, a brief and carefully applied correction might help to increase their attention.

A Word of Caution

While positive punishment may deliver quick results, it often comes at a cost. Overuse or misuse can harm your dog’s emotional well-being and weaken the trust between you and your pet. Dogs thrive on positive relationships, and training should focus on building confidence and mutual understanding.

Cons of Positive Punishment

While positive punishment may seem like a quick fix for unwanted behaviors, it comes with significant drawbacks and risks. If not used thoughtfully, it can harm your dog emotionally and strain your relationship. Let’s explore the challenges of this training method and why caution is essential.

Negative Impact on the Human-Animal Bond

  1. Erodes trust – Using punishment can severely damage the trust between you and your dog. They may start to fear you and become less willing to interact or cooperate.
  2. Creates fear and anxiety – Punishment can instill fear and anxiety in your dog. They may become fearful of certain situations, people, or objects, leading to generalized anxiety and even aggression.
  3. Triggers aggression – When dogs feel threatened or fearful, they may resort to aggression as a defense mechanism. Punishment can inadvertently increase the risk of biting, snapping, and other aggressive behaviors.

Inconsistent Application

It’s incredibly difficult to consistently and appropriately apply punishment. Timing, intensity, and the dog’s individual temperament all play a crucial role. Inconsistent punishment can leave your dog confused and frustrated, making them less likely to understand what behavior is expected of them.

Potential for Abuse

Punishment can easily escalate, especially when emotions are high. What starts as a minor correction can quickly turn into something more serious, leading to physical and emotional harm to your dog.

Focus on Suppression, Not Modification

Punishment primarily focuses on suppressing a behavior, not teaching your dog alternative, desirable behaviors. It doesn’t address the underlying cause of the problem and may simply lead to the unwanted behavior being redirected or suppressed until the punishment is removed.

Alternatives to Positive Punishment

Fortunately, there are many effective and humane alternatives to punishment-based training methods. These methods focus on building a strong, positive relationship with your dog while teaching them desired behaviors.

Positive Reinforcement

This is the cornerstone of effective dog training. Positive reinforcement involves rewarding your dog with something they enjoy like treats, praise, or playtime when they exhibit desired behaviors. This creates a positive association between the behavior and the reward, making them more likely to repeat it.

Negative Reinforcement

Negative reinforcement involves removing something unpleasant to increase a desired behavior. For example, releasing pressure on the leash when your dog walks calmly beside you is negative reinforcement. This teaches them that good behavior results in the removal of something they dislike leash pressure.

Redirecting Unwanted Behaviors

Instead of punishing unwanted behaviors, try to redirect your dog’s attention to something more appropriate. If your dog starts to chew on furniture, offer them an approved chew toy instead. This teaches them acceptable outlets for their natural instincts.

Focus on Preventative Measures

Early training is key to preventing many behavioral problems. Start training your puppy as soon as you bring them home, focusing on basic commands and socialization.

Environmental management is also crucial. Ensure your dog has access to plenty of exercise, mental stimulation, and appropriate outlets for their natural behaviors like chewing, digging, and barking.

Management and Prevention

  1. Prevent access – If your dog jumps on the counter, keep the counter out of reach.
  2. Provide alternatives – Offer appropriate chew toys to discourage chewing on furniture.
  3. Supervise closely – Keep a close eye on your dog, especially in situations where they may be tempted to engage in unwanted behaviors.

What is Positive Punishment in Dog Training

Tips for Responsible Dog Training

Training your dog is more than teaching commands—it’s about building a strong, trusting relationship that lasts a lifetime.

To make training a positive and rewarding experience for both you and your dog, here are some essential tips to keep in mind.

1. Seeking guidance from a certified professional dog trainer who uses force-free, positive reinforcement methods is highly recommended. A qualified trainer can:

  • provide personalized guidance
  • address specific behavioral challenges
  • ensure you’re using safe and effective training techniques.

2. A strong, trusting relationship is the foundation of effective dog training. Spend quality time with your dog every day through play, affection, and positive interactions. Build a strong bond based on trust, respect, and mutual enjoyment.

3. Clear and consistent communication is essential for effective training. Use clear and concise voice cues, consistent body language, and positive reinforcement to guide your dog. Avoid confusing or mixed signals that can leave your dog feeling uncertain.

4. Dog training takes time and effort. Don’t get discouraged if your dog doesn’t learn something immediately. Be patient, persistent, and consistent in your training efforts. Celebrate small successes and remember to keep training sessions fun and engaging.

Prioritizing Your Dog’s Well-Being in Training Decisions

Choosing training methods that prioritize your dog’s well-being should always be your top priority. Approaches that are kind, respectful, and effective ensures your dog feels safe, loved, and eager to learn.

Dogs are family, and they deserve training methods that reflect that. Humane training focuses on building trust, not fear.

We encourage you to explore force-free, positive reinforcement training methods. These techniques are backed by experts and proven to be effective while prioritizing your dog’s well-being. Take the time to research and choose methods that align with your values and your dog’s needs.

For more helpful advice, check out our blog, where you’ll find a wealth of resources, tips, and recommendations to guide you on your training journey.

If you have any questions or concerns about your dog’s training journey, we can help. If you’re unsure where to start or need personalized guidance, don’t hesitate to contact us. We’re here to help you choose the right training method that’s both effective and compassionate.

Together, we can ensure your dog’s training experience is positive, rewarding, and tailored to their unique personality.

Your dog’s well-being is worth it — and so is the bond you’ll build along the way.

What Is The Best Material for a Dog Sports Training Leash: A Guide

what is the best material for a dog sports training leash

What Is The Best Material for a Dog Sports Training Leash: A Guide

When it comes to dog sports training, the leash you choose plays a bigger role than you might think. The right material can make all the difference in performance, safety, and durability, ensuring both you and your dog enjoy a seamless training experience.

But with so many options available, it’s natural to wonder: what is the best material for a dog sports training leash?

This guide is here to help you make an informed decision.

We’ll break down the most popular materials, their pros and cons, and how to choose the perfect leash for your training needs. Whether you’re into agility, obedience, or high-energy sports, understanding your options will set you and your dog up for success.

Let’s dive in and find the best fit for you and your furry teammate!

Understanding the Basics of Dog Sports Training Leashes

A dog sports training leash is not your average leash. Think of it as a specialized tool designed to enhance your dog’s performance and your training experience.

While a standard leash might suffice for casual walks, dog sports require a leash that’s more than just a piece of rope.

Key features of a dog sports training leash:

  1. Strength
  2. Flexibility
  3. Weather resistance
  4. Comfort

Why Material Matters in Dog Sports

The material of a leash isn’t just about looks; it’s about function and safety.

  • A sturdy leash ensures it won’t snap during training, especially with strong or energetic dogs.
  • The right material moves with you and your dog, making it easier to maintain control without restricting movement.
  • Rain, mud, or snow — your leash needs to hold up in all conditions without becoming slippery or damaged.

In dog sports, challenges like wear and tear, uncomfortable grips, or leashes that don’t perform in wet weather can slow you down.

Choosing the right material can eliminate these issues, giving you peace of mind and helping your dog focus on the task at hand.

Key Factors to Consider When Choosing a Leash Material

Choosing the right leash material for dog sports training is not just about style — it is about ensuring safety, performance, and comfort for you and your furry companion. To make the best choice, consider these key factors.

Dog’s Size, Breed, and Temperament

Your dog’s unique characteristics play a huge role in selecting the right leash material.

  • Small Breeds vs. Large Breeds: Smaller dogs may need lightweight materials, while larger breeds require strong, durable options.
  • High-energy vs. Low-energy Dogs: High-energy breeds need a leash that can withstand their enthusiasm and constant movement. For calmer dogs, comfort and style might be top priorities.
  • Strong Pullers vs. Gentle Walkers: If your dog pulls like a freight train, you’ll need a leash that can handle the force. For gentle walkers, a lighter leash might be more suitable.

Type of Dog Sport

Different sports call for specific leash features:

  1. Agility course – Agility requires a leash that is flexible, durable, and minimizes drag to allow for quick turns and changes in direction.
  2. Tracking and search and rescue – These dogs often work in challenging outdoor environments. Waterproof and extremely durable materials are essential.
  3. Flyball – Speed is key in flyball! A lightweight and sturdy leash that allows for quick bursts of movement is ideal.
  4. Canicross – Canicross involves running with your dog. A strong and durable leash, often with some elasticity to absorb shock, is crucial.
  5. Obedience – Precision and control are paramount in obedience training. A smooth-handling leash that allows for precise commands is essential.

What Is The Best Material for a Dog Sports Training Leash

Training Environment

Where you train matters just as much as how you train.

  • Urban vs. Rural Settings: In urban areas, leashes should be easy to grip and control in busy spaces and less likely to snag on fences or debris. In rural or outdoor settings, durability against thorns, rough terrain, and weather is crucial.
  • Presence of Hazards: If you’re training in rugged environments, consider the potential for thorns, burrs, or other environmental hazards that could damage the leash. Choose materials resistant to wear and tear.

Right Leash Length

The length of your leash should match your training needs:

  • General training – A 6-8 foot leash offers versatility and control.
  • Agility – Shorter leashes (4-6 feet) reduce drag and enhance maneuverability.
  • Flyball – A short leash with a loop handle keeps things simple and effective.
  • Canicross – A bungee leash absorbs shock, making it ideal for running and pulling activities.

Popular Leash Materials and Their Pros & Cons

When it comes to dog sports training, the material of your leash is just as important as its design. Each material offers unique benefits and drawbacks, making it essential to choose the one that best suits your dog’s needs and your training goals.

Let’s take a closer look at some of the most popular leash materials and what they bring to the table.

Nylon

Pros: Durable, lightweight, and budget-friendly, nylon leashes are a popular choice. They come in a variety of colors and widths, making them versatile for different training styles.

Cons: Nylon can absorb odors and isn’t as strong as other materials for dogs that pull hard.

Cotton

Pros: Soft and comfortable, cotton leashes are gentle on your dog and absorbent, making them a good choice for casual training.

Cons: Cotton isn’t as durable as nylon, can fray over time, and isn’t ideal for strong pullers.

Leather

Pros: Leather leashes are a timeless favorite for their durability, stylish appearance, and comfortable grip. They age beautifully with proper care.

Cons: They can be pricey and require regular maintenance, like cleaning and conditioning, to stay in good shape.

Biothane

Pros: Known for its strength and waterproof properties, biothane is easy to clean, lightweight, and available in a range of colors. It’s perfect for outdoor activities.

Cons: Biothane can be more expensive than nylon and may not have the same soft feel as leather.

Rope

Pros: Rope leashes are extremely durable and provide a strong grip, making them ideal for dogs that pull hard.

Cons: They can be rough on the hands and may not offer the same comfort level for the dog as other materials.

Safety Considerations

When it comes to dog sports training, safety should always be a top priority. Here are some key safety tips to keep in mind:

  1. Proper leash fit – A leash that’s too long can create tripping hazards for both you and your dog, while a leash that’s too short can restrict movement and cause discomfort.
  2. Avoid leash retractors for training – Leash retractors can encourage pulling behavior in dogs, making training more challenging. They can also pose serious safety risks, such as the leash suddenly snapping back and injuring your dog or someone else.
  3. Regular inspections are crucial – Regularly inspect your leash for signs of wear and tear, such as fraying, broken stitching, or weakened clips. Replace any damaged leashes immediately to prevent accidents.

Tips for Testing and Maintaining Your Leash

Your dog’s leash is a lifeline during training. To keep it safe and reliable, it’s important to test and maintain it regularly.

Here are some essential tips to ensure your leash stays in top condition and performs well when it matters most.

How to Test a Leash Before Use

Before using a new leash, take a moment to check its quality:

  1. Strength test – Gently pull on the leash to ensure it’s sturdy and free from any weak points.
  2. Flexibility check – If you’re using your leash for agility, test its flexibility by moving it in different directions.
  3. Grip assessment – Make sure the leash provides a comfortable and secure grip in your hand.

Proper Maintenance for Longevity

Regular care can extend the life of your leash and keep it looking and working like new:

  • Nylon – Hand wash with mild soap and water, then air dry completely. Avoid harsh chemicals.
  • Cotton – Hand wash or machine wash on a gentle cycle. Air dry thoroughly to prevent mildew.
  • Leather – Clean with a damp cloth and mild leather cleaner. Condition regularly to keep it supple.
  • Biothane – Easily wiped clean with a damp cloth.
  • Rope – Hand wash with mild soap and water, then air dry completely.

When to Replace Your Leash

Even the best leashes don’t last forever. Watch out for these warning signs:

  • Fraying or splitting in the material.
  • Weak or damaged clips that don’t securely attach to the collar.
  • A loss of flexibility or cracks in leather or biothane.
  • Replace the leash immediately if you notice any of these issues to avoid accidents during training.

Choosing the Right Leash for Your Canine Athlete

Every dog and sport is unique, so the best leash material for your canine athlete depends on your specific needs and preferences. The right leash isn’t just about functionality; it’s an investment in your dog’s success and your shared training journey.

Invest in Quality: Choosing a high-quality leash from a reputable brand ensures durability, safety, and a more enjoyable training experience.

The right leash can significantly enhance your communication with your dog, build a stronger bond, and make training sessions more effective and rewarding.

Safety and quality should always come first. Prioritize your dog’s well-being by choosing high-quality leashes from trusted brands. A reliable leash sets the foundation for success in dog sports training.

Ready to learn more? 

Explore our blog for valuable tips and resources on dog training.

Have questions or need professional advice? 

Reach out to us — we’re here to help you and your canine companion thrive in dog sports training. Let’s make this journey exciting and rewarding together!

How Does A Clicker Work for Dog Training: Simple Guide Explained

how does a clicker work for dog training

How Does A Clicker Work for Dog Training: Simple Guide Explained

Clicker training has become a favorite method among dog trainers and pet parents alike, thanks to its simplicity and effectiveness. With just a small device that makes a distinct clicking sound, you can quickly teach your dog new tricks, improve their behavior, and strengthen your bond.

But how does a clicker work for dog training?

In this guide, we’ll break it down step by step, showing you exactly how this method helps your dog understand what you want.

Whether you’re training a playful puppy or an older dog, clicker training is a fun and rewarding way to communicate with your furry friend.

Let’s dive in and explore how you can start using a clicker to make training easier and more enjoyable for both you and your dog!

Understanding the Clicker

Clicker training is a game-changer for dog owners who want to train their pets in a fun and effective way.

But what makes this little device so powerful? Let’s break it down and understand why the clicker is such a valuable tool in dog training.

The Clicker’s Role

The clicker isn’t just a toy; it’s a magical marker! It pinpoints the exact moment your dog does something right. Unlike simply praising your pet, the clicker creates an instant, undeniable signal that they’ve nailed it.

Think of it like a photographer capturing the perfect shot – the clicker freezes that winning moment in time.

Comparing this to other training methods: Traditional training often relies on vague commands and inconsistent rewards.

The clicker, however, provides crystal-clear feedback. Your dog learns to associate the click with something amazing – a delicious treat!

The Association

This is where the magic happens. Every time your dog performs the desired behavior, you click and then immediately give them a tasty treat. This creates an ironclad link between the click and the reward.

Soon, your dog will understand: “Click” means “Party Time!” They’ll be eager to hear that click again, which motivates them to repeat the behavior.

Explain the Advantages of Clicker Training

  1. Precise timing – The clicker allows for incredibly precise timing. You can mark the exact instant your dog starts to sit, even if they only shift their weight slightly. This helps your dog understand exactly what you’re asking for.
  2. Crystal-clear communication – The clicker provides clear, consistent communication. Your dog learns to understand what behaviors are truly rewarded, leading to faster learning and fewer misunderstandings.
  3. Faster learning – Because the clicker provides such immediate feedback, your dog learns faster and retains the behaviors better. It’s like having a turbo boost for your training sessions!

The Clicker Training Process

Clicker training is a simple yet effective way to teach your dog new behaviors while strengthening your bond.

By using a clicker, you can clearly communicate with your dog, marking the exact moment they do something right. Let’s explore the step-by-step process to help you and your dog succeed.

Capturing Behaviors

The beauty of clicker training is that you can harness your dog’s natural instincts. Let’s say your dog suddenly sits down. Click! Treat! You’ve just “captured” a desired behavior. This teaches your dog that those random, wonderful things they do sometimes are actually rewarded.

Timing is everything here. The click must come instantly after the behavior. If you’re even a fraction of a second late, your dog won’t understand what they did to earn the treat.

Shaping Behaviors

Sometimes, you need to guide your dog towards a specific behavior. This is where “shaping” comes in. Let’s take “shaking” as an example.

  1. Start small – Click and treat your dog for lifting a paw.
  2. Gradually increase the difficulty – Click and treat for lifting a paw higher.
  3. Continue to break down the behavior – Click and treat for lifting the paw towards their nose.

Finally, click and treat for a full “shake”!

Luring and Rewarding

Sometimes, a little guidance is needed. This is where “luring” comes in. To teach “fetch,” you might gently guide your dog’s nose towards the toy with a treat.

The key is to reward the following of the lure, not just the final result. Click and treat your dog for even the slightest movement towards the toy. Gradually decrease the amount of luring as your dog starts to understand the game.

By mastering these techniques – capturing, shaping, and luring – you’ll be amazed at what your dog can learn!

Key Principles of Clicker Training

Clicker training is built on a foundation of kindness, clarity, and connection. By following a few simple principles, you can make training an enjoyable and rewarding experience for both you and your dog.

Here’s what makes clicker training so effective.

Positive Reinforcement

Think of it this way: you want to encourage your dog to do something, not scare them into submission.

Clicker training is all about rewards and praise. This approach not only encourages learning but also builds your dog’s confidence and enthusiasm. There’s absolutely no room for yelling, punishment, or any kind of scary training methods.

Clear Communication

Just like humans, dogs thrive on predictability. Clicker training provides a way to communicate clearly and consistently.

  • Use the same cues consistently. If “Sit” means sit, always use “Sit.”
  • Be consistent with your rewards. If a click means a treat, always follow the click with a treat.

This consistency helps your dog understand what you’re asking for and builds trust between you.

Building a Strong Bond

Clicker training isn’t just about teaching tricks; it’s about building a stronger bond with your dog. Every click and reward reinforces not only good behavior but also the bond you share.

  • Focus on making training fun and enjoyable for both of you.
  • Keep the sessions short and sweet.
  • Celebrate every success, no matter how small.

Steps to Start Clicker Training Your Dog

Starting clicker training with your dog is easy and fun! By following a few simple steps, you can teach your dog new behaviors while building trust and understanding. Let’s get started.

Step 1: Get Your Clicker and Rewards Ready

First things first: grab your clicker! You can find them at most pet stores. Now, it’s time to find the ultimate motivator for your dog.

Think high-value treats: small pieces of cheese, cooked chicken, or your dog’s favorite treats. These should be irresistible to your dog!

Step 2: Introduce the Clicker to Your Dog

Before you start training, “charge” the clicker. This means teaching your dog that the clicker means good things are coming!

  1. Click and treat, click and treat, click and treat!
  2. Repeat this a few times, letting your dog associate the click with the delicious reward.

Soon, your dog will be eagerly awaiting that click!

Step 3: Click and Reward Desired Behaviors

Start with simple behaviors your dog already knows, like sitting or coming when called.

  • Click the instant they sit.
  • Immediately follow the click with a treat.
  • Repeat this several times.

Your dog will quickly learn that sitting earns them a reward!

Step 4: Practice Consistency and Timing

The click must happen the exact moment your dog performs the desired behavior.

  1. Practice makes perfect.
  2. Keep training sessions short and fun.
  3. Most importantly, be patient and consistent.

With practice, your timing will improve, and your dog will catch on quickly.

Frequently Asked Questions About Clicker Training

Clicker training is a popular method, but it’s natural to have questions when starting something new. To help you feel confident, we’ve answered some of the most common questions about clicker training.

Can I use a clicker for all dog breeds?

Absolutely! Clicker training is a versatile method that works wonders with all breeds and sizes of dogs. From tiny terriers to majestic mastiffs, every dog can benefit from this positive reinforcement approach.

What if my dog is scared of the clicker sound?

If your dog seems startled by the clicker, simply introduce it gradually.

Start by clicking and immediately rewarding your dog with a treat from a distance. Gradually bring the clicker closer as your dog becomes more comfortable with the sound.

How long does it take for a dog to learn using a clicker?

Every dog learns at their own pace. Some dogs may catch on quickly, while others may take a bit more time. Consistency and patience are key.

Start Your Clicker Training Journey Today

Clicker training is a game-changer for both you and your dog. It’s simple, effective, and rooted in positive reinforcement, making it a rewarding experience for everyone involved.

By using a clicker, you can teach your dog new skills, improve their behavior, and strengthen the bond you share — all while having fun.

Every click, every treat, and every moment spent training brings you closer to a well-behaved and happy dog.

Ready to transform your dog’s training?

Why wait? Dive deeper into the world of dog training by exploring more tips and tricks on our blog.

If you’re ready to take the next step, consider signing up for our dog training course.

Want personalized advice or an assessment for your furry friend? Reach out to us today!

Whether you’re just starting or looking for professional guidance, we’re here to help you and your dog succeed.

Let’s make training a joyful journey together!

What Training is Required for an Emotional Support Dog Explained

what training is required for an emotional support dog

What Training is Required for an Emotional Support Dog: A Guide on What You Need to Know

Emotional support dogs (ESDs) play a vital role in improving mental well-being, offering comfort and companionship to those struggling with anxiety, depression, PTSD, and other emotional challenges.

Unlike service dogs, ESDs are not trained to perform specific tasks but provide unconditional support that helps individuals cope with daily life.

If you’re wondering what training is required for an emotional support dog, this guide is here to help. We’ll break down the essential skills your dog needs, explain the importance of proper behavior, and explore whether you can train your ESD yourself or should seek professional help.

By the end, you’ll clearly understand how to prepare your emotional support dog for its role effectively.

Understanding the Role of an Emotional Support Dog

Emotional support dogs (ESDs) are more than just pets; they are companions that provide comfort and emotional stability to individuals facing mental health challenges.

To truly understand their role, it’s important to see how they differ from service dogs and recognize their unique benefits and limitations.

While both Emotional Support Dogs (ESDs) and Service Dogs provide invaluable assistance, they serve distinct purposes and have different legal protections.

Service Dogs

These highly trained animals are specifically trained to perform tasks for individuals with disabilities, such as guiding the blind, alerting to seizures, or providing balance support.

Emotional Support Dogs

These animals provide comfort and emotional support to individuals with mental health conditions. They are not trained to perform specific tasks but rather offer companionship and alleviate symptoms of conditions like anxiety, depression, and PTSD.

Who Can Benefit from an Emotional Support Dog?

Individuals struggling with various mental health challenges can greatly benefit from the companionship of an Emotional Support Dog. These conditions include:

  • Anxiety disorders – ESAs can help alleviate anxiety symptoms by providing comfort and reducing stress.
  • Depression – The companionship of an ESA can alleviate feelings of loneliness and isolation, boosting mood and motivation.
  • Post-Traumatic Stress Disorder (PTSD) – ESAs can help individuals with PTSD manage flashbacks, nightmares, and hypervigilance.
  • Other mental health conditions – ESAs can also be beneficial for individuals with conditions like bipolar disorder, obsessive-compulsive disorder, and social anxiety disorder.

Legal Protections and Limitations

Emotional support dogs are protected under specific laws, but these protections are limited compared to service dogs.

The Fair Housing Act allows individuals to live with their ESDs in housing that might otherwise prohibit pets, ensuring they have the support they need at home. The Air Carrier Access Act previously allowed ESDs to travel in the cabin with their owners, but recent changes mean airlines may no longer be required to accommodate them.

While these rights help ensure ESDs can fulfill their role, it’s essential for owners to understand and respect the boundaries of these protections.

Does an Emotional Support Dog Require Specialized Training?

Training is just as important for emotional support dogs (ESDs) despite the fact that they do not need the same specialized training as service dogs. To provide the comfort and stability their owners need, ESDs must have good manners, basic obedience, and the ability to adapt to different situations.

Basic Obedience Training

Every emotional support dog should know basic commands like sit, stay, and come. These foundational skills are not just about good behavior — they help create a sense of order and predictability, which is essential for both the dog and its owner.

A well-trained ESD is easier to manage and more reliable in providing support, especially during stressful moments.

Behavioral Expectations

An emotional support dog should be calm and well-behaved, whether at home or in public. Barking excessively, jumping on people, or acting aggressively can disrupt the peaceful environment they’re meant to create.

Teaching your dog to remain composed and non-disruptive ensures they can offer the emotional stability you need without adding unnecessary stress.

Socialization Skills

Socialization is key to helping your emotional support dog feel comfortable around people, other animals, and different environments.

A well-socialized dog is less likely to become anxious or reactive in new situations, making it easier for them to accompany you wherever they’re allowed. Exposing your dog to various experiences early on can build their confidence and ensure they remain a source of calm and support.

Key Training Steps for an Emotional Support Dog

Training an emotional support dog (ESD) requires patience, consistency, and love. Each step in the process helps ensure your dog becomes a dependable and comforting companion, ready to support you in any situation.

Step 1: Establishing a Bond

The foundation of any successful training is a strong bond between you and your dog. Spend quality time together through play, walks, and quiet moments.

Building trust helps your dog feel safe and connected to you, creating a relationship where they naturally want to support and comfort you. A strong bond also makes training more effective, as your dog will be more eager to learn and please you.

Step 2: Teaching Basic Commands

Basic commands like sit, stay, and leave it are essential for any well-behaved dog, especially an emotional support dog. These commands help you manage your dog’s behavior and create structure, which is comforting for both of you.

Start with short, simple sessions and use positive reinforcement to encourage your dog as they learn.

Step 3: Reinforcing Positive Behavior

Consistency is key to training success. When your dog behaves well, reward them with treats, praise, or affection. Positive reinforcement helps your dog understand what’s expected and motivates them to repeat good behavior.

Be patient and clear, and avoid punishing mistakes — it’s better to guide your dog toward the right behavior instead.

Step 4: Public Behavior Training

An emotional support dog should be calm and well-mannered in public spaces. Practice exposing your dog to different environments, such as parks, sidewalks, or quiet cafes, to help them adjust to various sights, sounds, and smells.

Focus on teaching them to stay calm around people and other animals. A well-trained ESD that can handle public situations with ease provides greater peace of mind for both you and those around you.

Can You Train an Emotional Support Dog Yourself?

While some owners succeed with DIY training, others find professional guidance necessary. Let’s explore the pros and cons of training your ESD on your own and when to seek expert help.

Pros and Cons of DIY Training

Many people successfully train their Emotional Support Dogs (ESDs) at home. This approach offers several benefits:

  • Cost-effective – DIY training can save you money compared to hiring a professional trainer.
  • Personalized attention – You can tailor the training to your dog’s specific needs and learning style.
  • Bonding opportunity – Training together can strengthen the bond between you and your dog.

DIY training also presents challenges:

  • Time-consuming – Effective training requires consistent effort and time commitment.
  • Potential for mistakes – Without proper guidance, you may inadvertently reinforce negative behaviors.
  • Limited expertise – You may lack the knowledge and skills to address complex behavioral issues.

When to Seek Professional Help

If you encounter difficulties with your ESA’s training or if your dog exhibits severe behavioral problems, it’s advisable to consult a professional dog trainer. Consider seeking professional help if:

  • Your dog has aggression issues.
  • Your dog is excessively fearful or anxious.
  • You’re struggling to establish basic obedience.
  • Your dog has difficulty socializing with other animals or people.

Finding the Right Trainer

When selecting a professional trainer, look for someone with experience working with emotional support dogs. Consider the following tips:

  1. Certifications and qualifications – Check if the trainer has relevant certifications or qualifications.
  2. Positive reinforcement techniques – Ensure the trainer uses positive reinforcement methods to avoid fear and stress.
  3. Experience with ESAs – Look for a trainer who understands the unique needs and challenges of emotional support dogs.
  4. References and reviews – Ask for references from previous clients and read online reviews.

Certification and Documentation: What You Need to Know

When it comes to emotional support dogs (ESDs), understanding the necessary documentation and avoiding scams is essential.

While certification isn’t legally required, having the right paperwork and ensuring your dog is well-behaved can make a big difference in how smoothly you navigate housing or travel situations.

The Role of an ESA Letter

An Emotional Support Animal (ESA) letter is a crucial document that confirms your need for an ESA and the specific mental or emotional condition it helps alleviate. This letter is typically issued by a licensed mental health professional, such as a psychiatrist, psychologist, or therapist.

Why is an ESA letter important?

  1. Legal protection – An ESA letter can provide legal protection under the Fair Housing Act and the Air Carrier Access Act.
  2. Housing rights – It allows you to live with your ESA in housing that typically doesn’t permit pets.
  3. Travel rights – It grants you the right to travel with your ESA on airlines.

Avoiding Scams

Unfortunately, there are fraudulent organizations that offer fake ESA certifications. To protect yourself and your rights, be cautious and avoid these scams. Here are some tips:

  • Verify the mental health professional – Ensure the provider is licensed and reputable.
  • Legitimate documentation – A genuine ESA letter should include the provider’s credentials, contact information, and a detailed explanation of your condition.
  • Avoid online mills – Be wary of online services that offer quick and easy ESA certifications without a proper evaluation.

Does Your Dog Need Certification?

Legally, emotional support dogs do not require certification or specialized training. However, good behavior is crucial.

Landlords or others interacting with your dog will appreciate a calm, well-mannered animal. Proper training ensures your dog can provide the support you need without causing unnecessary disruptions.

Ensuring Your ESA’s Success

Your emotional support dog (ESA) plays a vital role in your well-being, and ensuring their success starts with proper training and care. A well-trained ESA is not only a source of comfort but also a joy to have by your side in any situation.

Commit to Training and Care

Training isn’t a one-time effort — it’s an ongoing process that strengthens the bond between you and your dog. Regular practice of basic commands, public behavior training, and socialization helps your ESA remain calm, well-mannered, and reliable.

Along with training, providing your dog with proper care, including a healthy diet, regular exercise, and routine vet visits, ensures they are happy and ready to support you.

Start your ESA’s journey today!

Don’t wait to start training your ESA. The earlier you begin, the better. By investing time and effort in training and bonding, you can create a strong partnership with your ESA.

Need professional guidance?

If you’re unsure about training your ESA or need expert advice, our team of professional dog trainers is here to help. Consult one of our experienced dog trainers for personalized support. We offer personalized training plans and guidance to help you and your ESA achieve your goals.

For more information and tips on training and caring for your ESA, check out our blog.

Together, let’s ensure your ESA becomes the best support companion they can be.

Training a Dog Not to Pull When Walking: Easy Tips for Success

training a dog not to pull when walking

Effective Tips to Train Your Dog Not to Pull on the Leash While Walking

Walking your dog should be an enjoyable bonding experience, but leash pulling can become a frustrating challenge.

When your dog pulls on the leash, it disrupts your walks and poses safety risks for both of you. This behavior often stems from excitement, distractions, or a lack of proper training, making strolls anxiety-inducing instead of fun.

The good news is that leash pulling can be fixed with patience and the right approach. In this guide, we’ll share effective tips for training a dog not to pull when walking, helping you create a calmer, more enjoyable experience.

From understanding why your dog pulls to step-by-step techniques and useful tools, you’ll find everything you need to reclaim the joy of walking together. Let’s turn your walks into a positive and rewarding experience for you and your furry friend!

Understanding the Root Cause of Leash Pulling

If your dog pulls on the leash, the first step to solving the problem is understanding why it’s happening. By pinpointing the cause, you can tailor your approach and make training more effective.

Identifying Your Dog’s Triggers

Dogs pull on the leash for many reasons, often because something grabs their attention. It could be a squirrel darting across the sidewalk, the scent of another dog, or even the sound of kids playing nearby. Observing your dog during walks is key — what excites or distracts them the most?

Pay attention to when and where the pulling happens. This awareness helps you anticipate and manage these triggers, so you can teach your dog to stay calm and focused instead of rushing ahead.

Assessing Your Dog’s Energy Level

A high-energy dog may pull simply because they have too much pent-up energy. Without enough exercise or mental stimulation, your dog’s excitement can spill over the moment they’re on the leash. Try giving them a quick play session or some interactive toys before heading out for a walk.

A tired dog is less likely to pull and more likely to listen to your guidance. By addressing their energy needs, you set the stage for a smoother, more enjoyable walk.

Essential Tools for Successful Leash Training

Having the right tools can make all the difference when it comes to leash training your dog. The right equipment not only keeps your dog comfortable but also helps you communicate effectively during training. Pairing these tools with positive reinforcement will set you and your furry friend up for success.

Choosing the Right Equipment

The equipment you choose plays a big role in leash training.

  1. Harness – Distributes pressure evenly across your dog’s chest, reducing strain on the neck.
  2. Head collar – Gently redirects your dog’s attention when they pull.
  3. Training leash – Provides extra length for practicing loose-leash walking.

Avoid using tools like choke chains or prong collars, as they can cause discomfort or harm. Instead, focus on equipment that prioritizes safety and comfort while helping you teach your dog to walk calmly.

The Role of Treats and Rewards

Treats are a leash training essential! Using high-value treats – those your dog absolutely loves – helps reinforce positive behavior. Every time your dog walks calmly without pulling or responding to a command, reward them with a treat and praise.

This positive reinforcement helps them understand what behavior earns rewards and makes leash training a fun and rewarding experience for both of you.

Step-by-Step Techniques to Stop Leash Pulling

Stopping your dog from pulling on the leash might feel challenging, but with the right techniques, it’s entirely possible. Training your dog to walk calmly takes patience, consistency, and the right approach.

These step-by-step methods will help you guide your dog toward better leash behavior, turning stressful walks into enjoyable outings.

Each technique is designed to teach your dog that pulling gets them nowhere, while calm, controlled walking earns them rewards and praise. Let’s dive into the steps to help your dog become a polite walking companion!

Teach the Heel Command

The “heel” command teaches your dog to walk calmly by your side. To start, have your dog sit next to you. As you begin walking, gently guide them to your side using a leash and a treat. Reward them for staying close to you.

Step-by-Step Method to Teach Heel

  1. Start in a quiet space – Begin training in a distraction-free area like your backyard or a quiet room indoors.
  2. Prepare with treats – Keep high-value treats in a pouch or your hand, ready to reward good behavior.
  3. Use a cue word – Choose a cue like “heel” or “close” and consistently use it to signal your dog to walk beside you.
  4. Position your dog – Stand with your dog at your side. Hold the leash in one hand and a treat in the other, keeping the treat near your leg to guide them into the heel position.
  5. Take a few steps – Say “heel” and take a few steps forward. If your dog stays beside you, immediately reward them with a treat and praise.
  6. Stop and reset when they pull – If your dog pulls ahead or lags behind, stop walking. Gently guide them back to your side, use your cue word, and start again.
  7. Gradually add distractions – Once your dog reliably heels in a quiet space, practice in more distracting environments, like your driveway or a quiet park. Increase distractions slowly to set them up for success.
  8. Reward consistently – Reinforce good behavior with treats, praise, and affection.

Stop-and-Go Technique

The stop-and-go technique is a simple yet powerful way to teach your dog that pulling on the leash won’t get them where they want to go.

Whenever your dog pulls, immediately stop walking and stand still. Wait patiently until the leash slackens, indicating that your dog has calmed down. Once the leash is loose, reward your dog with praise or a treat, then continue walking.

It’s a clear and consistent method that helps your dog understand that walking calmly by your side is the best way to keep moving forward.

Change Direction to Redirect Focus

If your dog is constantly pulling or distracted during walks, a simple change of direction can work wonders. Switching directions suddenly grabs their attention, encourages them to focus on you, and teaches them to stay close. It’s a fun, interactive way to make your walks more controlled and engaging.

How to Use Direction Changes

  • Be unpredictable – When your dog starts pulling or seems fixated on something, stop and turn in a new direction. It could be a sharp U-turn or a simple left or right turn.
  • Encourage them to follow – As you change direction, gently guide your dog with the leash and encourage them to follow you.
  • Keep the walk dynamic – Repeat direction changes whenever your dog pulls or loses focus. Over time, they’ll start paying more attention to your movements, anticipating your cues, and staying by your side.
  • Make it a game – Think of this technique as a game to keep your dog engaged.

Reward Calm Behavior

Positive reinforcement is a powerful tool in dog training. Whenever your dog walks calmly beside you, be sure to reward them with praise, a gentle pet, or a tasty treat. This positive association will encourage them to repeat the desired behavior.

Remember:

  • Timing is key – Reward your dog immediately after they exhibit good behavior.
  • Variety of rewards – Use a combination of verbal praise, physical affection, and treats to keep your dog motivated.

Addressing Common Leash Training Challenges

Leash training can be a rewarding experience, but it’s not always easy, because there will likely be challenges along the way. From distractions to stubborn pulling, it’s important to be prepared for common issues that can arise during training.

With patience and the right strategies, you can overcome these hurdles and help your dog become a well-behaved walking companion.

Handling Excitement or Overstimulation

Excitement and overstimulation can be major roadblocks when it comes to leash training. Some dogs get so eager for their walk that they pull before you even step out the door, while others become overly excited by every new sight and sound along the way.

Managing this energy and keeping your dog calm before and during walks is key to successful training.

Calming Your Dog Before Walks

  • If your dog has a lot of pent-up energy, consider playing with them or doing a short training session before the walk.
  • Before you even grab the leash, take a few minutes to get your dog in a calmer state.
  • Don’t rush your dog into the walk.

Managing Distractions During the Walk

  • Stay calm and controlled
  • Use redirection techniques
  • Gradual exposure to distractions
  • Shorter, more frequent walks

By addressing excitement and overstimulation head-on, you can help your dog stay focused and relaxed during walks.

Dealing with Stubborn Behavior

It’s not uncommon for some dogs to show stubborn behavior during leash training. Whether they refuse to walk calmly or keep pulling despite your efforts, it can be frustrating. However, with patience and persistence, you can break through this barrier and help your dog learn how to walk politely on the leash.

Tips for stubborn dogs:

  • Keep training sessions brief and focused.
  • Reinforce commands indoors in a calm environment.
  • Reward even small improvements to keep your dog motivated.

Dealing with stubborn behavior can be tough, but with patience, short sessions, and indoor reinforcement, your dog will eventually understand the rules.

Keep working at it, and remember that every step forward—no matter how small — is progress!

Reaping the Rewards of Leash Training

When you implement these techniques, you’ll start to see real progress, and soon, your walks will be a joy rather than a struggle. The bond between you and your dog will strengthen, making every walk an opportunity for positive interaction.

Now it’s time to take action!

Start implementing these tips today and witness the transformation in your dog’s behavior and enjoy calm, stress-free walks with your furry companion.

For more in-depth guidance and additional tips, explore our blog for more articles on leash training and dog behavior.

If you encounter challenges or need personalized advice, don’t hesitate to reach out to us, we have professional dog trainers ready to assist your dog training needs. We’re here to help you and your furry companion achieve your training goals.

What Are the Best Dog Training Treats: Top Picks for Your Pup

what are the best dog training treats

What Are the Best Dog Training Treats: Top Picks for Your Pup

Have you ever wondered why dog trainers seem to have a magical touch, effortlessly guiding their furry companions?

One secret ingredient to their success lies in the power of dog training treats. These small rewards can make a big difference in your dog’s training journey.

Choosing the right dog treats is crucial for effective and enjoyable training sessions. With countless options available on the market, it can be overwhelming to determine what are the best dog training treats to use for your pup and why they matter.

In this guide, we’ll explore the key factors to consider when selecting dog training treats and recommend top picks to help you and your furry friend achieve training success.

Ready to find your dog’s favorite training reward? Let’s dive in!

Understanding the Role of Training Treats

Training treats aren’t just snacks but powerful tools for teaching your dog good behavior. Here’s why they play such an important role in training.

Why Dog Treats Are Essential in Training

Treats are a great way to grab your dog’s attention and keep them focused during training sessions. They act as a reward for following commands or showing good behavior, helping your pup understand what you want from them.

Positive Reinforcement and Reward-Based Training

Using dog treats as positive reinforcement makes training fun and effective. When your dog knows they will get a tasty reward for doing something right, they are more likely to repeat that behavior. This method encourages learning without fear or punishment.

Building Trust and Motivation

Treats help build a stronger bond between you and your dog. They show your pup that listening to you leads to something good, creating trust and keeping them motivated to learn.

Encouraging Good Habits

When you reward your dog with a treat for doing something right, you’re teaching them that good behavior gets rewarded. Over time, they’ll start repeating these actions, turning them into habits. Treats make learning fun and exciting for your pup, which helps keep them engaged and eager to learn.

Reinforcing Consistency in Commands

Consistency is key in dog training, and treats help you achieve it. Every time your dog follows a command and gets a treat, it reinforces the connection between the command and the action. This repetition makes it easier for your dog to understand and remember what’s expected, making training smoother and more effective.

What Makes a Good Training Treat?

Not all treats are created equal, especially when it comes to training. The right treat can make learning faster and more enjoyable for your dog. Here are the key factors that make a treat ideal for training:

  1. Small and easy to eat – Good training treats should be easy to chew. This allows your dog to enjoy the reward quickly without slowing down the training session.
  2. Tasty and irresistible – The best training treats are ones your dog loves. A flavorful treat keeps their attention and motivates them to follow commands.
  3. Healthy ingredients – A good treat should be made with wholesome ingredients. Look for options that are natural and avoid artificial additives or fillers. Treats should be tasty and healthy!
  4. Low in calories – Since you’ll be using many treats during training, low-calorie options are important to avoid overfeeding or weight gain.
  5. Training purpose – Consider the specific behavior you’re training. For high-value behaviors, use high-value treats, such as small pieces of meat or cheese. For simple commands, lower-value treats, like commercial training treats, may suffice.

Different Types of Dog Training Treats

Dog training treats come in many varieties, each with unique benefits. Understanding the options can help you find the best fit for your pup.

Soft and Chewy Treats

Soft treats are easy to chew and quick to eat, making them perfect for training sessions especially for a puppy. Dogs can enjoy them without much effort, keeping the focus on learning. These are especially great for puppies and older dogs with sensitive teeth.

Crunchy Biscuits and Kibbles

Crunchy treats are a classic choice. While they might take a little longer to eat, they work well for less intense training sessions. They’re also easy to store and last longer than softer treats.

Freeze-Dried and Dehydrated Treats

These treats are lightweight and packed with flavor, retaining the natural goodness of ingredients like meat or fish. They’re a high-value reward, making them ideal for teaching complex commands or reinforcing good behavior during high-energy activities.

Homemade Training Treats

Homemade treats let you control the ingredients, ensuring your dog gets something both healthy and delicious. Simple options like boiled chicken, sweet potato bites, or small cheese cubes are easy to make and customize.

Top Picks for Dog Training Treats in 2024

With so many options available, finding the best training treats for your pup can feel overwhelming. To make things easier, here are the top picks for dog training treats in 2024, chosen for their taste, quality, and effectiveness.

High-Value Treat

Boiled chicken is considered the gold standard in high-value treats because it is highly palatable and healthy. Boiled chicken is easy to prepare and can easily be broken into small pieces for training sessions.

Low-Calorie Treat

Pet Botanics Training Rewards are soft, bite-sized treats perfect for training. This treat is made of real meat protein, dried whole eggs, potatoes, and botanicals. It is made without any artificial additives.

Calorie content: Regular size: 3 calories per treat; Mini version: 1.5 calories per treat

Budget-Friendly Option

The Cloud Star Tricky Trainer Chewy Treats are a low-calorie, healthy treat free from corn, wheat, soy, or dairy. It has a soft and chewy texture without the stickiness, perfect for training.

Price: Under $13 for a 14-ounce bag.

Allergy-Friendly Treats

Natural Balance Limited Ingredient Treats are made of premium quality, human-grade  ingredients. These treats are suited for dogs with allergies. It comes in 3 variants: chicken, turkey, and salmon.

Calorie content: Less than 4 calories per treat

Note: All of these dog treats are recommendations. Remember to do your research and read reviews to find the best treats for your specific dog. Consider factors like your dog’s allergies, dietary needs, and personal preferences.

Tips for Choosing the Perfect Treat for Your Pup

When selecting dog training treats, it’s important to consider a few factors to ensure you choose the perfect reward for your furry friend:

Consider Your Dog’s Age and Size

  • Puppies – Small, soft treats are ideal for puppies, as they have delicate teeth and stomachs.
  • Adult dogs – Adult dogs can handle a wider variety of treats, including crunchy biscuits, soft chews, and freeze-dried options.
  • Senior dogs – Senior dogs may have specific dietary needs, so it’s important to choose treats that are easy to chew and digest.

Dietary Restrictions and Sensitivities

If your dog has any food allergies or sensitivities, it’s crucial to choose treats that are free of those ingredients. Look for treats that are labeled as hypoallergenic or grain-free.

Activity Level and Training Goals

  • High-energy dogs – For high-energy dogs, consider treats that are high in protein and low in fat.
  • Low-energy dogs – For low-energy dogs, choose treats that are lower in calories to avoid weight gain.

Why Dog Training Treats Matter

Choosing the right dog training treats is essential for a successful training journey.

By using treats as positive reinforcement, you can effectively communicate with your dog, build trust, and encourage desired behaviors. Remember, training should be a positive experience for you and your furry friend.

So, the next time you reach for a treat, take a moment to consider its suitability and potential impact on your dog’s training progress. By making informed choices, you can create a stronger bond with your dog and achieve your training goals.

Now that you know the ins and outs of dog training treats, it’s time to put this knowledge into action. Start implementing these tips today and watch your furry friend flourish.

Still unsure about the best treats for your pup? 

Don’t hesitate to visit your local pet store or consult with a veterinarian or professional dog trainer.

They can provide personalized recommendations based on your dog’s specific needs and behavior.

Remember, a happy, well-trained dog starts with a few simple steps. Let’s get started!

What Equipment Do You Need for Dog Agility Training

what equipment do you need for dog agility training

What Essential Equipment Do You Need for Dog Agility Training: Must-Have Equipment

Dog agility training is a thrilling activity that challenges both dogs and their owners. It’s a great way to keep your furry friend physically fit, mentally stimulated, and bonded with you.

This popular activity has dogs navigating obstacle courses, weaving through poles, leaping over hurdles, and much more.

But to ensure your dog’s safety and maximize training benefits, having the right equipment is crucial – whether you’re setting up a practice area at home or planning for competitions. Without the right tools, you risk injuries and may find it challenging to guide your dog effectively.

This guide will walk you through what equipment you need for dog agility training, covering the essential gear for creating a safe, enjoyable, and productive environment.

From basic hurdles to supportive safety gear, you’ll learn everything needed to get started confidently in dog agility training.

Foundational Agility Obstacles for Beginners

As you embark on your dog’s agility training journey, it’s important to start with the basics. These beginner-friendly obstacles teach essential movements and help your dog develop focus, balance, and coordination.

Below, we’ll go through each foundational obstacle one by one and explain how each helps prepare your dog for more advanced agility challenges.

Hurdles and Jumps

Jumps are a classic part of agility courses, helping your dog practice coordination and build muscle. Starting with low jumps will let your dog get comfortable with jumping without straining themselves.

These obstacles come in different forms including:

  • bar jumps
  • panel jumps
  • tire jumps

Weave Poles

Weave poles are a row of poles that your dog has to weave through, which requires focus and agility. These poles can be tricky at first, but they’re excellent for teaching your dog how to navigate tight spaces and improve their balance.

Why are weave poles essential in agility training?

  1. Focus and obedience – teach dogs to focus on their handler’s cues and follow instructions precisely.
  2. Coordination and agility – Navigating the weave poles improves a dog’s coordination, agility, and flexibility.
  3. Confidence – Successfully completing the weave poles boosts a dog’s confidence and self-esteem.

Tunnels

Tunnels are another exciting obstacle in agility. They come in various types, including closed tunnels and open tunnels.

  1. Closed Tunnels – These are enclosed tubes that the dog must enter and exit. They can be intimidating for some dogs, but they can also be incredibly rewarding.
  2. Open Tunnels – Open tunnels are similar to closed tunnels, but they have a mesh or net covering, allowing the dog to see through. They can be a good starting point for dogs who are hesitant to enter closed tunnels.

Both tunnel types are excellent for teaching dogs navigation skills, enhancing their ability to respond to your cues, and increasing their willingness to face new challenges. These will then boost their confidence, focus, coordination, and spatial awareness.

Pause Table

The pause table is a valuable obstacle in dog agility training, designed to help your dog practice stopping and staying in place on command.

When a dog reaches the pause table, they’re expected to jump onto it, stop, and hold a position — typically sitting or lying down — for a set amount of time. This may sound simple, but it’s an important skill that builds obedience and control.

Advanced Agility Equipment for Progression

Once your dog has mastered the basics, it’s time to introduce more challenging obstacles that build on their skills and increase their agility. Advanced agility equipment is designed to improve balance, confidence, and precision, helping your dog progress to a higher level of training.

Here, we’ll explore some of the key pieces of advanced equipment and explain how each can support your dog’s development.

A-Frame

The A-frame is a challenging obstacle that resembles an inverted “V.” It requires dogs to climb up one side and down the other, often at a steep angle. This obstacle helps build a dog’s:

  • Strength – climbing the A-frame strengthens a dog’s legs and core muscles.
  • Body awareness – Dogs must learn to coordinate their movements and maintain balance while navigating the incline.
  • Confidence – Successfully conquering the A-frame boosts a dog’s self-esteem and confidence.

To train your dog on the A-frame, start with a low angle and gradually increase the incline as your dog becomes more comfortable.

Use positive reinforcement to reward your dog for each step they take up and down the A-frame.

Dog Walk

The dog walk is an elevated, narrow platform that your dog must cross from one end to the other. It consists of a horizontal plank raised off the ground with ramps on each end for easy access.

The purpose of the dog walk is to teach your dog balance and careful foot placement as they navigate a narrow path. Training on the dog walk helps dogs develop better control over their movements, as they need to stay centered on the plank while walking at a steady pace.

This obstacle requires focus and patience, as even small missteps can lead them off track. Practicing on the dog walk not only strengthens your dog’s stability but also boosts their confidence in moving across different surfaces.

Mastering this obstacle is a great way for dogs to improve their agility skills and increase their coordination.

Teeter-Totter (Seesaw)

The seesaw is an excellent tool for teaching dogs to handle shifting surfaces. The seesaw in dog agility training looks just like a regular seesaw where one end rises as the dog walks across it, and then tilts down once they pass the center.

Why is the seesaw important?

  1. Dogs must constantly adjust their balance as the seesaw tilts back and forth.
  2. They need to coordinate their movements to step carefully and maintain their footing.
  3. Successfully navigating the seesaw can boost a dog’s self-assurance.

This skill is valuable not only for agility but also for everyday life, especially when navigating uneven terrain or slippery surfaces.

Training Tools to Aid in Skill Development

In addition to agility obstacles, various training tools can make a big difference in helping your dog develop essential skills for agility.

These tools are designed to improve focus, build confidence, and support learning as your dog practices agility movements. Below, we’ll explore some of the most useful training tools and how each one can aid in skill development.

Agility Cones

Agility cones are versatile training tools that can be used to create various obstacle courses and drills. They are particularly useful for:

  1. Creating mini-courses – Arrange cones in different patterns to form simple obstacle courses. You can use them to practice weaving, circling, or changing directions.
  2. Teaching directional changes – Place cones in various locations to teach your dog how to turn, pivot or change direction on cue. This is helpful for improving your dog’s agility and responsiveness.
  3. Marking obstacles – Use cones to mark the start and end points of obstacles, helping your dog understand the sequence of the course.

Agility cones are a great way to add variety and challenge to your dog’s training sessions. They are affordable, portable, and can be used both indoors and outdoors.

Clicker and Treat Pouch

Positive reinforcement is a key part of successful dog training, and tools like a clicker and treat pouch can make it easy to reward your dog’s progress.

Clicker

A clicker is used as a marker to signal to your dog that they’ve performed a desired behavior correctly. The clicker sound should always be followed by a reward, such as a treat.

This creates a strong association between the clicker sound and the reward, motivating your dog to repeat the behavior.

Treat Pouch

A treat pouch is a convenient way to carry treats during training sessions. It allows you to quickly reward your dog for good behavior, keeping them engaged and motivated.

Training Leash or Harness

A training leash or harness is an essential tool for guiding your dog, especially when they are first learning agility. It allows you to maintain control and keep your dog safe while they navigate obstacles and practice new skills.

Why use a training leash or harness?

  • Safety – prevents your dog from running into obstacles or other dogs.
  • Control – allows you to guide your dog’s movements and correct any mistakes.
  • Focus – helps your dog stay focused on you and the task at hand.

As your dog becomes more experienced, you may be able to use a longer leash or even train them off-leash. However, it’s important to start with a shorter leash or harness to ensure safety and control.

Safety and Supportive Equipment

Safety and supportive equipment are essential parts of any agility training program, ensuring that your dog stays protected as they learn new skills.

Agility training can be physically demanding, so using the right safety gear helps prevent injuries and makes training more comfortable for your dog.

Below, we’ll look at some of the key safety and supportive items that can make a big difference in training.

Non-Slip Mats or Flooring

Non-slip mats or flooring are crucial for ensuring your dog’s safety during agility training, especially when practicing indoors or in specific areas.

As your dog moves quickly through the course, they need a stable surface to avoid slipping or losing balance, which could lead to accidents or injuries.

Why are non-slip mats: 

  • provides extra grip to avoid skidding
  • especially helpful on smooth floors, which can be slippery for dogs
  • reduces stress on your dog’s joints 

Whether you’re training inside your home or setting up an agility space in your yard, using non-slip mats ensures your dog can focus on the course without worrying about losing traction.

Dog Safety Gear (Paw Pads, Wraps, etc.)

While not always necessary, some dogs may benefit from additional protective gear, especially during intense training sessions or on challenging surfaces. Here are a few options to consider:

  1. Paw pads – can protect your dog’s paws from cuts, scrapes, and burns, particularly on hot surfaces or rough terrain.
  2. Leg wraps – can provide support and protection for your dog’s legs, especially during jumping and landing. They can help prevent injuries to tendons and ligaments.

It’s important to consult with your veterinarian or a professional dog training before using any protective gear on your dog. They can help you choose the right size and type of gear for your dog’s specific needs.

First Aid Kit

Even the most carefully planned training sessions are not without possible accidents. A well-stocked first-aid kit helps address minor accidents promptly and effectively.

Essential items for your dog’s first-aid kit:

  • Antiseptic wipes
  • Bandages
  • Gauze pads
  • Tweezers
  • Hydrogen peroxide
  • Over-the-counter pain relievers for dogs

Consult with your veterinarian to create a first-aid kit tailored to your dog’s specific needs and any pre-existing health conditions.

Setting Up a Dog Agility Course at Home

Setting up a dog agility course at home can be a fun and rewarding way to train your dog, especially if you don’t have access to a professional course nearby.

In this section, we’ll guide you through the basics of setting up your own course and what to consider to ensure it’s safe and effective.

Space Considerations

When setting up a dog agility course at home, the amount of space you have will play a big role in how you design the course. Whether you have a small area or a large yard, you can still create an effective and fun training space for your dog by making a few smart adjustments.

Small Spaces

  • Indoor courses – Utilize your living room, garage, or basement.
  • Compact obstacles – Opt for smaller, portable obstacles like mini-weave poles and low-height jumps.
  • Creative course layouts – Design courses that fit within your space, using walls and furniture as boundaries.
  • Outdoor training – Use your backyard or a local park for larger obstacles and open space.

Large Spaces

  • Outdoor courses – Your yard or a nearby field offers ample room for full-sized obstacles.
  • Multiple course layouts – Experiment with different course designs to keep your dog engaged.
  • Training zones – Divide your space into different training zones for specific skills.
  • Storage solutions – Invest in storage solutions to keep your equipment organized and protected.

The most important thing is to make the most of the space you have. With a little creativity and planning, you can create a challenging and rewarding agility course for your dog, no matter the size of your space.

DIY vs. Store-Bought Equipment

When setting up a dog agility course at home, you have two options for your equipment: building your own DIY obstacles or purchasing pre-made items.

Each has its own set of advantages and challenges, so let’s explore both options to help you decide what’s best for you and your dog.

DIY Equipment

Pros:

  • Customization
  • Cost-effective
  • Creative outlet

Cons:

  • Time-consuming
  • Durability
  • Safety considerations

Store-Bought Equipment

Pros:

  • Convenience
  • Durability
  • Variety

Cons:

  • Cost
  • Less customization

Which is Better?

It really depends on your priorities. If you’re looking for a low-cost option and don’t mind putting in the time to build your own equipment, DIY is a great choice.

On the other hand, if you prefer convenience, durability, and a wider selection, store-bought equipment is the way to go.

Either way, both options can help you create a fun and effective agility training setup for your dog!

Maintenance Tips for Agility Equipment

Keeping your dog agility equipment in good shape is essential for both safety and long-term use.

Regular maintenance and cleaning will help you avoid wear and tear and ensure a safe training experience for your dog.

Here is a checklist you can follow to keep your equipment in top condition:

  1. Clean equipment regularly
  2. Inspect for wear and tear
  3. Store equipment properly
  4. Check non-slip surfaces
  5. Maintain DIY equipment carefully
  6. Keep equipment dry

By taking these simple steps to maintain and clean your dog agility equipment, you’ll not only help it last longer but also create a safer, more enjoyable training experience for your dog.

Regular maintenance doesn’t take much time, and it will go a long way in keeping your agility course in great shape!

Setting the Stage for Agility Success

Now that you have a solid understanding of the essential equipment and tools for dog agility training, you’re ready to embark on this exciting journey with your furry friend.

Remember these key tips:

  • Begin with basic obstacles and gradually introduce more challenging ones as your dog progresses.
  • Learning agility takes time and practice. Don’t get discouraged if your dog doesn’t master a skill immediately.
  • Use positive reinforcement techniques to motivate and reward your dog.
  • Always prioritize safety. Choose the right equipment, inspect it regularly, and avoid pushing your dog beyond their limits.

By gathering the essential equipment, creating a safe training environment, and practicing regularly, you and your furry friend can achieve great things in the world of agility.

So, what are you waiting for? 

Ready to start an exciting journey with your dog? 

Begin their agility training today by investing in the right equipment and giving them regular, fun practice sessions!

With the right tools and a little patience, you’ll help your dog build confidence, fitness, and skills that last a lifetime.

Need more tips?

Don’t forget to explore our blog for more resources on dog training, agility tips, and everything you need to know to bring out the best in your furry friend. We’re here to support you every step of the way!

Have questions or need personalized advice on choosing equipment? 

Reach out to us — we’d love to help you get started on this rewarding adventure with your dog!

Let’s make your dog agility journey a success!

How to Use a Dog Training Collar: A Simple Guide for Beginners

how to use a dog training collar

How to Use a Dog Training Collar: A Simple Guide for Beginners

Using a training collar can be a helpful way to guide your dog’s behavior and reinforce positive habits.

A dog training collar is a tool that, when used correctly, can help signal to your dog when they need to listen, making it a popular choice for dog owners who want to improve training outcomes.

However, it’s essential to use a training collar safely and humanely to ensure your dog’s well-being and comfort. Without proper guidance, it’s easy to make mistakes that could confuse or stress your pet.

This simple guide on how to use a dog training collar is designed for beginners, providing the basics you need to know to use a training collar effectively.

With these tips, you’ll learn the essentials of responsible collar use to support your dog’s training journey in a positive way.

Let’s get started!

How to Use a Dog Training Collar Effectively

In this section, we’ll dive into the basics of using a dog training collar effectively.  A training collar can be a helpful tool to guide your dog’s behavior, but using it the right way is key to achieving good results.

Remember, these collars are tools to aid in training, not a substitute for positive reinforcement.

Preparing to Use a Training Collar

Before you start using a training collar with your dog, it’s essential to take a few steps to ensure a smooth, positive experience.

Proper preparation can make all the difference in helping your dog get comfortable with the collar and setting a solid foundation for training.

1. Proper Fit and Adjustment

  • Collar size – Make sure the collar fits snugly but comfortably around your dog’s neck. You should be able to fit two fingers between the collar and your dog’s neck.
  • Electrode placement – If your collar uses electrodes, ensure they are positioned correctly. Consult your collar’s manual for specific instructions.

2. Gradual Introduction

  • Low-level stimulation – Start with the lowest level of stimulation to acclimate your dog to the sensation.
  • Positive association – Pair the collar with positive experiences, such as treats and praise.

3. Adjusting Settings

The specific settings will vary depending on your collar model. However, here are some general guidelines:

  • Start low – Begin with the lowest level of stimulation and gradually increase it as needed.
  • Monitor your dog’s reaction – Watch your dog’s body language and behavior to gauge their comfort level.
  • Consult the manual – Always refer to your collar’s manual for specific instructions on adjusting settings.

Basic Training Techniques with a Collar

Using a dog training collar can be an effective way to teach and reinforce good behaviors, especially when combined with positive reinforcement.

Here are some simple techniques to help you get the most out of training with a collar:

  1. Positive reinforcement techniques – When your dog follows a command or behaves well, reward them with treats, praise, or even a favorite toy. The collar should only act as a gentle reminder to help them focus; the real reward is in your positive feedback.
  2. Consistency is key – Regular training sessions will help your dog learn faster and build good habits. Try to keep training sessions short and consistent, practicing a little each day to reinforce what they’ve learned.
  3. Reinforcing commands with the collar – For basic commands, use the collar to gently remind your dog to pay attention. For example, if you call your dog to “come” and they hesitate, give a gentle signal with the collar and reward them when they respond correctly. This helps them connect the command with the desired action.
  4. Avoid punishment-based training – Focus on positive reinforcement rather than punishment. The goal of the collar is not to scare your dog but to help guide their attention back to you when they’re distracted or engaged in an undesired behavior.
  5. Using mild correction when needed – If your dog starts pulling on the leash or barking excessively, you can use the collar to give a mild correction. This should be gentle and just enough to get their attention. After the correction, guide them toward the right behavior, and always reward them when they respond well.

Understanding Dog Training Collars

Using a training collar isn’t about punishment; it’s about gentle guidance. The collar helps bridge the communication gap, making it easier for your dog to understand what’s expected in a positive and clear way.

In this section, we’ll walk you through all you need to know about dog training collars, the different types of training collars, and how to choose the right collar for your furry companion.

Types of Training Collars

There are several types of training collars available, each designed for different uses and training purposes. Here’s a look at some of the most common types:

1. Prong Collar

How it works: A prong collar consists of a series of metal prongs that rest against the dog’s neck. These prongs create a mild pressure to a dog’s neck to discourage leash pulling.
Purpose: It’s often used to correct pulling on a leash on larger and stronger dogs who may pull a lot.
Important Note: While effective for some dogs, it’s crucial to use a prong collar correctly to avoid causing discomfort or injury. Consult with a professional trainer for guidance.

2. E-Collar

How it works: An e-collar delivers a very mild electric pulse to a dog’s neck to get their attention.
Purpose: It can be used to correct unwanted behaviors, such as barking or jumping. They’re often used for off-leash training.
Important Note: E-collars should be used with extreme caution and only under the guidance of a qualified trainer. Excessive use can lead to fear and aggression in dogs.

3. Vibration Collar

How it works: A vibration collar emits vibrations to a dog’s neck.
Purpose: It’s often used for general obedience training and are effective for teaching basic commands.
Important Note: Vibration collars can be effective for some dogs, but it’s essential to use them appropriately to avoid causing unnecessary stress.

4. Citronella Collar

How it works: A citronella collar sprays a harmless mist of citronella onto a dog’s neck when it barks excessively. The citronella is a scent that dogs typically dislike.
Purpose: It’s designed to deter barking.
Important Note: Citronella collars can be effective for some dogs, though they may not work for every dog as some may not be affected by the scent.

Choosing the Right Collar

Selecting the right training collar for your dog is essential to ensure that training is both effective and comfortable.

Here are some tips to help you choose the best collar based on a number of factors:

  1. Consider your dog’s size – Smaller dogs may require lighter, more comfortable collars, as they can be more sensitive to pressure or discomfort. Larger dogs, on the other hand, may benefit from collars that provide more control due to their stronger build.
  2. Breed and temperament – Different breeds have different temperaments, which can affect the type of collar that works best. For example, breeds like German Shepherds or Border Collies might respond well to an e-collar or vibration collar when used for off-leash training.
  3. Behavioral issues – Think about the specific behavior you want to address. If your dog is pulling on the leash, a prong collar may help provide controlled correction. If barking is an issue, a citronella collar could be effective.
  4. Your training goals – Your goals will help guide the choice of collar. For basic obedience, a vibration collar can work well to reinforce basic commands. If you’re focusing on off-leash training or working with a more independent dog, an e-collar may be more appropriate.

Note: Always choose a collar that aligns with your training method, ensuring that it is used safely and with respect for your dog’s comfort.

Don’ts of Training Collar Use

While training collars can be a helpful tool, it’s important to use them properly to ensure they are both effective and humane.

Here are some key things to avoid when using a training collar:

  • Overusing the collar – Use the collar sparingly and only during training sessions. Overusing the collar can lead to fear, anxiety, and aggression in dogs.
  • Ignoring basic obedience training – Before using a training collar, ensure your dog has a solid foundation in basic obedience commands like “sit,” “stay,” and “come.” Prioritize positive reinforcement over anything else and build a strong bond with your furry companion.
  • Neglecting regular check-ups – Regularly inspect your dog’s neck for any signs of irritation or skin damage. If you notice any issues, consult with your veterinarian for advice.

Monitoring Your Dog’s Progress

As you use a training collar, it’s important to monitor how your dog is responding to ensure that the collar is helping with their training and that they are comfortable.

Here are some signs that show progress and that your dog is reacting positively to the collar:

  • Increased focus
  • Willingness to follow commands
  • Positive body language
  • Calm and comfortable behavior
  • Improved attention during walks or outings

By keeping an eye on these signs, you can ensure that your dog is making progress in their training and that the training collar is being used effectively.

When to Adjust Collar Use Techniques

As your dog progresses in their training, it’s important to adjust the collar settings and how often you use it. This helps ensure that the training remains effective without causing unnecessary stress or discomfort.

Below are some of the guidelines on when to adjust collar use:

  • Once your dog consistently responds to commands, you can gradually reduce the level of stimulation.
  • As your dog’s obedience improves, you can use the collar less frequently.
  • As your dog’s behavior improves, shift your focus more towards positive reinforcement and less on the collar.

By making these adjustments, you ensure that the training collar continues to be a helpful tool, providing the right level of guidance without overstimulating or confusing your dog.

Graduating from the Collar

As your dog becomes more confident and consistent in their training, there will come a time when you can begin transitioning away from the training collar.

Recognizing when it’s time to move to collar-free training is an important step in your dog’s learning journey.

Transitioning away from the collar should be gradual. Start by reducing its use in training sessions and observe how your dog behaves without it.

This will help your dog rely on their training and reinforce the trust you’ve built between you. By graduating from the collar, you’re showing that your dog has mastered the behaviors and can now thrive in a collar-free environment.

If you’ve reached this point, congratulations!

You’ve successfully used the training collar to help your dog learn and grow. Remember to continue practicing positive reinforcement techniques to maintain your dog’s good behavior.

Responsible Training with a Dog Collar

It’s important to remember that a training collar is just a tool to help guide your dog during their learning process.

The collar’s purpose is to support your training, not to do the work for you!

Positive reinforcement helps your dog understand what they should do, while the collar can simply provide a gentle reminder when needed.

Dogs need time to learn, and they thrive in an environment where they are praised for good behavior and gently corrected when needed. Rushing the process or using the collar too often can confuse your dog, so always be patient and consistent in your approach.

Ready to embark on a rewarding training journey with your furry friend?

We encourage you to try using a training collar with care, focusing on positive, mindful practices.

Check out our blog posts for more in-depth information on dog collars, training techniques, and tips for a well-behaved dog.

Want to take your dog’s training to the next level? Need some extra help?

Don’t hesitate to reach out to us!

Our team is here to talk about our training programs, which emphasize the safe and responsible use of dog collars.

We also offer personalized assessments to understand your dog’s unique needs and goals, ensuring the best training plan for success.

Let’s work together to build a strong bond with your dog and create a harmonious home.

Schedule a personalized consultation with us today to discuss your dog’s specific needs and goals.

What is Bubble Theory Dog Training and Its Key Benefits

what is bubble theory dog training

What is Bubble Theory Dog Training and Its Key Benefits

Imagine creating a safe, invisible bubble around your dog. A space where they feel secure and calm, free from distractions and overwhelming stimuli. This is the core idea behind Bubble Theory dog training.

Often, dogs can become overwhelmed by their surroundings, leading to anxiety, reactivity, and poor behavior. By respecting their “bubble” and teaching them to navigate social interactions calmly, we can significantly improve their overall well-being and trainability.

In this guide, we’ll walk you through what is bubble theory dog training, its governing principles, and explore how it can transform your dog’s behavior. We’ll discuss the key benefits of this gentle yet effective training method, from reduced stress to improved obedience.

Let’s embark on this journey together and unlock your dog’s full potential.

The Core Principles of Bubble Theory Dog Training

At the heart of Bubble Theory lies the concept of respecting a dog’s personal space. This “bubble” is an invisible boundary that surrounds the dog, defining their comfort zone.

A skilled trainer understands the importance of maintaining this bubble and adjusts their interactions accordingly.

A Gentle Approach

Unlike traditional distraction-based training, Bubble Theory focuses on creating a calm and controlled environment. Instead of forcing a dog to confront stressors, the trainer gradually expands the dog’s comfort zone. This gentle approach minimizes anxiety and promotes positive associations with training.

Key Techniques and Strategies for Bubble Theory

When using Bubble Theory in dog training, a few simple techniques can make a big difference in helping your dog feel secure and build confidence.

  1. Gentle leader and harness usage – Help guide your dog without putting pressure on their neck or causing discomfort. These tools give you better control over your dog’s movements, allowing you to guide them safely within their “bubble” space. Using a harness or gentle leader also allows you to keep a respectful distance from triggers, making it easier for your dog to stay calm.
  2. Positive reinforcement and rewards – Positive reinforcement is the cornerstone of Bubble Theory. By rewarding your dog with treats, praise, or a favorite toy when they respond calmly within their bubble, you’re encouraging good behavior in a positive way.
  3. Patience and consistency – Essential for successful Bubble Theory training. Every dog learns at their own pace, so it’s essential to give them time to feel comfortable in new situations. Consistently respecting their bubble space and reinforcing calm behavior will gradually build their confidence, allowing them to adjust without feeling rushed.

How Bubble Theory Works in Practical Training

Bubble Theory can be applied to various real-world scenarios to help your dog navigate different situations calmly. Let’s explore some practical examples:

  • Leash walks – When you’re out walking, Bubble Theory keeps your dog focused and comfortable. Start by respecting their bubble distance — if they’re nervous around other dogs, for instance, keep a respectful distance to avoid stress. Gradually, as your dog becomes more confident, you can decrease the space, allowing them to observe other dogs calmly without feeling cornered or threatened.
  • Meeting new people – Using Bubble Theory, you control how close others come to your dog’s bubble. Instead of allowing people to rush in for a pet, ask them to stay at a comfortable distance, allowing your dog to approach when they feel ready. This choice gives the dog a sense of control, making social interactions far less intimidating.
  • Public spaces – Public areas are full of sounds, sights, and smells that can overwhelm a dog. With Bubble Theory, you can position yourself to create a buffer, allowing your dog to explore at their own pace without feeling crowded.

Key Benefits of Bubble Theory in Dog Training

Bubble Theory offers a range of benefits that make it a powerful approach for dog training. It offers a multitude of benefits for both dogs and their owners:

  • Reduced stress and anxiety
  • Improved obedience
  • Better social behavior
  • Increased confidence
  • Stronger bond with the owner
  • Improved focus and training success
  • Flexibility for different dog personalities

A well-adjusted, calm, and obedient dog leads to a happier and more fulfilling life for both the dog and the owner. Overall, you and your dog experience an enhanced quality of life.

Training Tips for Implementing Bubble Theory at Home

Implementing Bubble Theory at home is a rewarding way to help your dog feel safe, calm, and confident. This section will discuss the breakdown of some key pointers to get started on Bubble Theory training at home.

Assessing Your Dog’s Comfort Zone

The first step is understanding your dog’s initial comfort zone, or “bubble.” Spend time observing how close they’re comfortable with people, other animals, and different environments.

Watch for signs of stress, like pulling away, tensing up, or avoiding eye contact, which may mean they’re reaching their boundary. Respect this space as you begin training, as it’s essential for helping your dog feel safe.

Building Gradual Exposure

Once you’ve identified your dog’s bubble, gradually work on decreasing that distance. Here are some pointers on what to do:

  • Start small – Begin with low-stress situations, such as quiet walks in familiar areas.
  • Slow and steady – Gradually introduce new stimuli, such as approaching other dogs or people, at a distance that keeps your dog comfortable.
  • Positive reinforcement – Reward calm behavior with treats, praise, or playtime.
  • Patience is key – Don’t rush your dog into bubble theory training. Allow them to adjust at their own pace.
  • Avoid forceful interactions – Never force your dog into uncomfortable situations. This can lead to increased anxiety and resistance.

Positive Reinforcement Techniques

Positive reinforcement is a powerful way to encourage calm behavior in and around the bubble.

  • Timing is crucial – Reward your dog immediately when they exhibit calm behavior.
  • Variety of rewards – Use a variety of rewards to keep your dog engaged, such as treats, toys, or affection.
  • High-value rewards – For particularly challenging situations, use high-value rewards to motivate your dog.
  • Celebrate small wins – Reward even the smallest progress to build your dog’s confidence.
  • Avoid punishment – Punishment can damage trust and hinder progress. Focus on positive reinforcement instead.

How Bubble Theory Can Support Behavior Modification

In this section, we’ll explore how Bubble Theory can help modify a dog’s behavior in a gentle and effective way. By using a “bubble” to create a safe personal space around your dog, you can gradually address and reshape behaviors like reactivity, anxiety, and excessive excitement.

Helping Reactive Dogs

Reactive dogs often respond with barking, lunging, or pulling when they feel their personal space is invaded or when they’re overwhelmed by certain triggers, like other dogs, loud noises, or unfamiliar people. By creating a “bubble” or safe space around them, you can help minimize these triggers and allow your dog to feel more in control.

  • Minimizing triggers – When you keep a comfortable distance between your dog and what triggers their reactivity, you’re giving them the space they need to observe without feeling threatened. This “buffer zone” reduces stress, making it easier for your dog to stay calm and composed.
  • Gradual exposure – Using Bubble Theory, you can slowly bring your dog closer to the trigger over time, as long as they remain calm. This gradual exposure helps them build confidence and trust.
  • Building positive associations – When your dog stays calm within their bubble, reward them with treats or praise. This positive reinforcement encourages them to associate remaining relaxed with good outcomes, helping reduce reactivity in future encounters.

Reducing Anxiety and Fear-Based Behaviors

By creating a safe and predictable environment, you can help reduce your dog’s anxiety and fear-based behaviors. By gradually exposing them to new situations within their comfort zone, you can help them build confidence and overcome their fears.

  • Creating a sense of security – When anxious dogs have a bubble around them, they’re less likely to feel overwhelmed by close interactions. They can take in new sights and sounds without feeling pressured to react or defend themselves, which helps them stay calmer.
  • Reducing stress in new environments – By using Bubble Theory, you can introduce your dog to new environments gradually, always respecting their need for space. Over time, as they become more familiar with the setting, you can gently reduce the bubble size, allowing them to get closer without feeling threatened.
  • Encouraging confidence and trust – A safe bubble gives your dog the time they need to adjust, leading to a boost in confidence. When they see that they’re in control of their space and that nothing negative happens within it, they learn to trust both the environment and you as their handler.

Aiding in Focused Training Sessions

By creating a calm and controlled training environment, Bubble Theory can help dogs focus better.

When dogs feel safe and secure, they are more receptive to training and less likely to be distracted by external stimuli. You can then optimize training sessions and achieve faster results.

  • Minimizing distractions – In many training settings, dogs are easily distracted by other animals, people, or sudden noises. Bubble Theory helps by giving your dog a comfortable space, free from close interactions or surprise interruptions. With fewer distractions within this bubble, your dog can pay closer attention to you and the task at hand, leading to more effective learning.
  • Reducing stress for better learning – Dogs often struggle to focus when they’re stressed or anxious. Bubble Theory reduces this stress by creating a zone where your dog doesn’t feel pressured or overwhelmed. When they’re calm, they’re much more open to training, making it easier for them to remember commands and routines.
  • Encouraging engagement – A well-defined bubble helps your dog know that this is “their space,” allowing them to feel confident and secure. Within this safe zone, they’re more likely to engage actively in training activities, as they don’t feel the need to watch out for possible threats.

Why Bubble Theory is a Game Changer for Dog Training

Ready to revolutionize your dog’s training?

Bubble Theory is a gentle yet powerful approach that works wonders for dogs of all breeds, sizes, and temperaments. Whether you have a high-energy puppy or a calm senior dog, Bubble Theory can help you achieve your training goals.

If you’re looking for an approach that’s gentle yet powerful, Bubble Theory could be the perfect fit. It allows your dog to feel safe while learning how to calmly handle the world around them.

With Bubble Theory, you’re giving them the space to grow, adapt, and feel at ease, making it a valuable addition to any training routine.

Don’t just take our word for it. Many dog owners have experienced the transformative power of Bubble Theory.

Why not give it a try and see the difference it can make in your dog’s life?

Start your dog’s journey to confident and calm behavior today!

Incorporate Bubble Theory techniques into your daily training routines and witness the incredible transformation.

Need more guidance?

Whether you’re interested in hands-on training, easy-to-follow guides, or expert advice, we’re just a call away. We’d love to help you develop a customized training plan that fits your dog’s unique needs and personality.

We’re committed to helping you and your furry friend achieve your training goals. Let’s work together to make your dog’s journey to calm, confident behavior a success!

Call us now to schedule a consultation and get started on your dog’s Bubble Theory journey.

Skip to content